Baby girl is due in only two weeks and I feel giddy when I hold this quilt and know I get to snuggle her up in it so soon!
 I admit being a big fan of the chevron craze, I love modern quilting, and my true style is spontaneous when it comes to quilting. With these preferences in mind, my design for a “broken herringbone” pattern evolved. I purchase fabric like I do paint: a little of this color and a little of that, and we’ll see how things turn out. So– I stocked up on a bunch of kona cotton solids and gathered some of my nearest and dearest fabric stash members to create the special quilt for baby girl. I wanted to emphasize purple and coral prints and solids and some favorite Heather Ross prints. I also was so excited to incorporate some of the prints generously gifted to me by my amazing midwife. She seriously showed up one with a bundle of beautiful printed quilting cotton one day, just for me. It is an honor to leave her “thumbprint” on this baby quilt too! So I cut an
 excessive sufficient number of the colored strips so I’d have room for variety and rearranging into whatever design I came up with for the front and back sides.
 These strips are 3″ wide x 9″ long, minus a 45 degree angle trimmed off of both ends. I needed strips with angles slanting in both directions, so this was done by stacking two strips wrong sides together and trimming the corners off simultaneously. For all of the colored/ patterned strips I needed the same number of white strips. I had the opportunity to cut “extra” ones of these, since I mistakenly started out with 7″ strips and cut those down. (Ooops. I’ll have to figure out something to make with those spares.)
 Layout went something like this . . . with vertical white sashing in between each of the 8 rows. I decided to offset the “chevron” look at this point and it became more of a herringbone pattern. I went to work sewing each row- it came together pretty quickly. Then for the back side of the quilt, which could easily be the front because I love how it turned out! I love to pay special attention to both sides, and when possible add a bit of personalized embroidery for my “signature touch.” We don’t have our baby girl’s name officially decided yet, so I wasn’t ready to stitch it in, but you can’t lose with “hello sunshine” right? I love the light, airy feel of the faux bois white with grey on the reverse side.
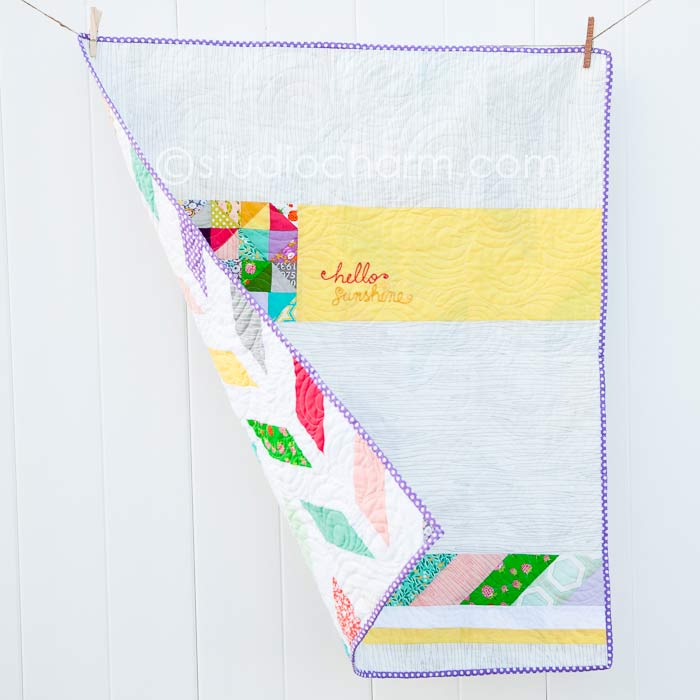 And the little “mini quilt” came about because of all of those little 45 degree angled pieces I cut off the original strips. I had to do something with them! I made sure the back was generously sized so my amazingly talented quilter Melissa at Sew Shabby Quilting would have room to maneuver as she worked her free motion quilting magic. I allowed for 6″ or so of extra fabric on all 4 sides.
 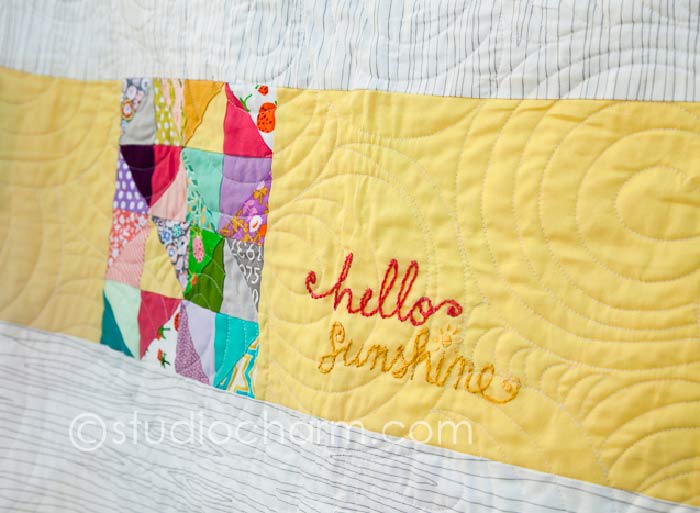 Melissa worked up an idea for her freehand baptist fans for the quilting and I am absolutely amazed at how she keeps the continuity and design going all throughout. It was just the perfect organic touch to a more modern, linear design. We opted to go with white thread to keep the quilt on the lighter side.
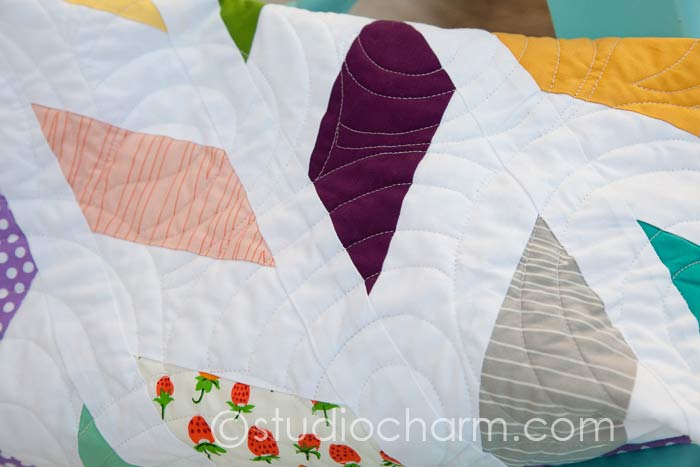 One of the most anticipated moments is when I go to pick up my quilt “babies” from Sew Shabby Quilting and have a chance to marvel at yet another amazing collaborative effort! She is truly an artist and I love to see how our creativity balances and works together. I look forward to blogging about more of my quilts that Melissa has quilted for me.
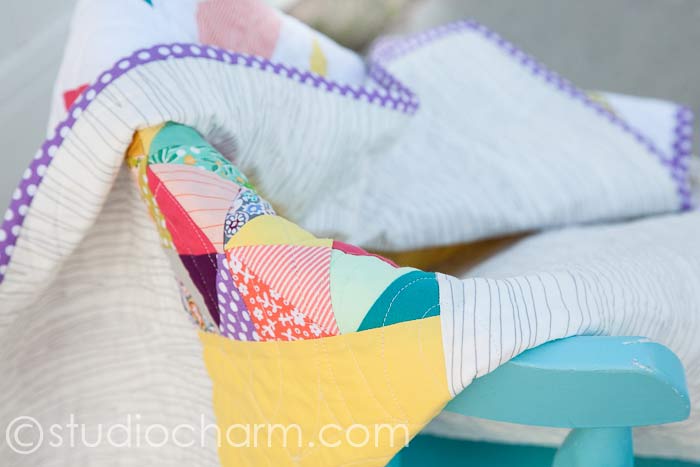 My Hubby voted for the purple with white polka dot binding. I think it was the perfect touch to finish off this quilt! I really love the look of hand sewn bindings, and this one was sewn while enjoying another great episode of Downton Abbey (perfect way to relax on a Sunday evening! )
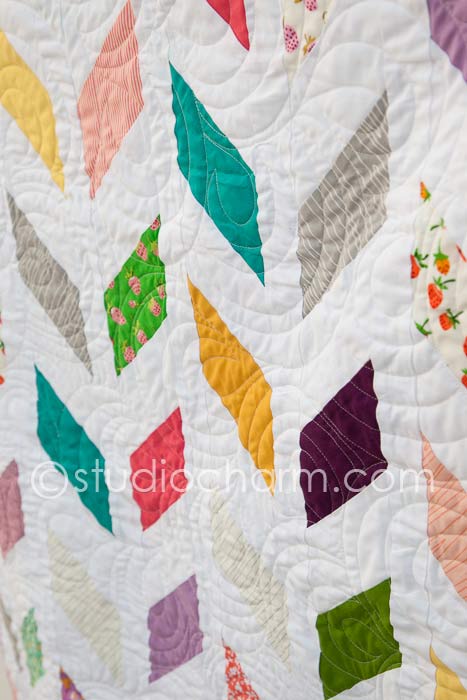 I’ll be snuggling my new babe in this quilt . . . ANY DAY NOW! Can you believe it? I’ll showcase the quilt with our newest baby model when she arrives. 😀
PS: I found this tutorial to be helpful when I was thinking through how the quilt would come together. I made changes to suit my preferences, but I really appreciated the step by step tutorial of cutting the strips to get me started!